• About Me

lifeisdelish

lifeisdelish

Category Archives: recipes

Spaghetti with Bacon and Mushroom

26 Saturday May 2012

Posted by sue-ann in pasta, quick and easy, recipes

≈ Leave a comment

Tags

bacon and mushroom spaghetti, pasta


The H requested we have pasta for dinner before this evening’s race.  I did a quick check in the fridge and I was pleased I could use up various stray ingredients accumulated over the past couple of weeks: A handful of button mushrooms, 200g of bacon (cos I accidentally bought more than I needed for the boeuf bourguignon on Mom’s birthday), 3/4 can of diced tomatoes, about 2 cups of tomato sauce, a few tbs of tomato paste, some sun-dried tomatoes and some capers.

We ended up with this yummy spaghetti which had us going back for seconds and thirds. Halfway through dinner, my daughter asked if we could have this for dinner again tomorrow.  Pleasing them pleases me.

Here’s the recipe:

Pasta Sauce:

Heat 1 cup olive oil in a skillet and saute 3 tbs chopped garlic till cooked.
Add about 200g sliced bacon and saute for about 2-3 mins, then add sliced mushrooms and saute till browned.
Stir in finely-chopped sun-dried tomatoes and capers, diced tomatoes, tomato sauce, about 2 tbs tomato paste, and simmer, stirring, until diced tomatoes are softened and sauce is thickened.
Add salt and black pepper to taste.

Cook 350g spaghetti in a pot of water with 1-2 tsp salt over high heat.
Once spaghetti is cooked, drain and toss well with the sauce and 2-3 tsp chopped Italian parsley in a large bowl.

Serves 4-5.

Advertisement

Share this:

  • Facebook
  • Twitter
  • More
  • Tumblr
  • Pinterest
  • LinkedIn
  • Reddit
  • Email

Like this:

Like Loading...

Capellini with Lumpfish Caviar: Lazy Posh Nosh

23 Monday Apr 2012

Posted by sue-ann in pasta, quick and easy, recipes

≈ Leave a comment

Tags

caviar, pasta

We had the pleasure of hosting dinner on Saturday for some awesome people who’d played a significant role in my life as I matured professionally.  It was all pretty relaxed, and we had a really nice evening with them.  But since I’d been cooking and baking for a good part of Friday afternoon, and cooking and eating again on Saturday evening, I didn’t feel like fussing over dinner on Sunday.

So with some lumpfish caviar we had in the fridge, some fresh basil and chopped garlic, I put together an easy 15-minute pasta for Sunday dinner which still made us feel rather spoilt.

Ingredients
(Note: quantities are estimates only)

130g Capellini (Angel Hair Pasta)
5-6 tbs olive oil
2 tbs chopped garlic
6 fresh basil leaves, sliced/shredded
1 small jar (about 1.5-2 tbs) lumpfish caviar
Salt to taste

Method

Boil pasta in big pot of water with 1 tsp salt until al dente, then drain.
In the meantime, heat up olive oil in a skillet, then saute chopped garlic till cooked.
Toss hot pasta in a large bowl with the cooked olive oil, garlic, caviar, and basil leaves.
If too dry when tossing, add a little of the water which the pasta had been cooked in.
Add salt to taste.

Serves 2.

Share this:

  • Facebook
  • Twitter
  • More
  • Tumblr
  • Pinterest
  • LinkedIn
  • Reddit
  • Email

Like this:

Like Loading...

Carrot Walnut Cake: My Favourite Kind of Sugar Rush

18 Wednesday Apr 2012

Posted by sue-ann in bakes, Carrot Walnut Cake, recipes

≈ Leave a comment

Tags

carrot cake


Carrot Walnut Cake with Orange Zest (Photographed by my friend M)

I’ve been in a reflective mood the past couple of weeks, trying to be quiet and still so that I could think.  Every once in awhile, I feel the need to do this to help me regain equilibrium. It helps me ensure that I’m not just going through the motions or going with the flow. Life has too many distractions; so it’s hard to remain constantly focused on that which really matters.

I’ve been cooking, though; I just haven’t been blogging. And that one time I wanted to share my new Seafood Hor Fun recipe here, I found that the photographs had vanished from my memory card.

I’ve also been baking Carrot Cake. I’ve been a fan of the Carrot Walnut Cake at Cedele for a long time.  Sweet, moist, nutty and covered with a wonderful cream cheese frosting, it was the only carrot cake I cared for.  Of course I never imagined that I’d be able to produce a cake like that in my own kitchen.  But about a year ago, fuelled by one of my episodic bursts of baking energy, I hunted down a Carrot Walnut Cake recipe which, much to my delight and excitement, enabled me to do just that.

This brought a smile to her face

The daughter shares my passion for this cake.  She requested I bake one for her birthday earlier this month. But although my previous attempts at it based on the Epicurious recipe for Carrot Cake with Maple Cream Cheese Icing did produce cakes which were literally swooned over, I’d experienced some difficulty and had to make slight adjustments to the oven temperature and baking time.  I also had to tweak the frosting to get it the way I liked. So since I wasn’t confident that I would get a consistent result, I thought I should practice and experiment a little more.

Apart from working with the Epicurious recipe, I also tried an alternative but similar recipe: the Hummingbird Bakery Carrot Cake I came across on Food Stories.  This one had pecans and orange zest as added ingredients.  In fact, the daughter’s birthday cake was based on this, except that I omitted the pecans and cut down the icing sugar for the frosting (I used only 3.5 cups).

So we’ve been having plenty of very delicious carrot cake around here.  Over a span of 2 or 3 weeks, I made whole cakes as well as cupcakes and shared them with some family, friends and colleagues, all of whom I believe were happy they could help in the sampling.  A pleasure to the tastebuds, albeit a bane to the waistline. 

Cupcakes for the colleagues

The two recipes vary only slightly. In fact, the difference in the resulting taste could escape some if we didn’t have both cakes together for comparison. Overall, the daughter and I prefer the Epicurious one because the cake comes out a little more moist, and a hint richer and sweeter, which I attribute to more sugar and egg. I was also not very keen on the orange zest in the Hummingbird/Food Stories recipe, although the H liked the addition.

Both recipes result in very delicious carrot cake – the sort of cake you can’t just take a bite of.  You’ll want to eat the whole slice even if at first you didn’t intend to.  Trust me.

“So whether you eat or drink or whatever you do, do it all for the glory of God.” – 1 Corinthians 10:31

Share this:

  • Facebook
  • Twitter
  • More
  • Tumblr
  • Pinterest
  • LinkedIn
  • Reddit
  • Email

Like this:

Like Loading...

Chicken Wings with 1/2 the Guilt in 1/2 the Time

28 Tuesday Feb 2012

Posted by sue-ann in chicken wings, Chicken Wings with 1/2 the Guilt, recipes

≈ Leave a comment

Tags

easy chicken wings


Crispy Roasted Chicken Wings with Balsamic-Soy Glaze

I rarely make fried chicken wings at home.  Usually, our chicken wings are marinated for a couple of hours before they are baked in the oven.  It’s a healthier alternative to fried chicken wings, involves less active time when cooking, and leaves you with much less cleaning up. Plus I dare say they taste as good, if not better.

But we don’t always have the time to prepare and marinate ahead.  So over the weekend, I tried a quicker and easier recipe.  Instead of marinating the wings, they were simply patted dry, tossed in salt and pepper, baked on high heat till the skin turned crispy, then coated in glaze.

I tried two different kinds of glaze with them: the first was a balsamic-soy glaze which allowed the wings to remain super crispy while giving them a deliciously sweet coating; and the other was a spicy sauce akin to buffalo sauce, but with an Asian twist because of the Thai chilli sauce that went into it.

Buffalo Wings with an Asian twist

The balsamic-soy wings turned out to be more popular.  While the buffalo wings had a little more kick because of the heat, the glaze was absorbed into the skin, which compromised crispiness. But still pretty good, especially considering it was so easy to do.

Ingredients

For Wings:

2 kg chicken wings
3 tbs olive oil
2 tsp salt
1 tsp ground black pepper

For Buffalo Wings Sauce:

1.5 tbs butter, melted
1 tsp chilli powder
1/2 tsp ground black pepper
1/4 tsp salt
4 tbs Thai sweet chilli sauce

For Balsamic-Soy Glaze:

4 tbs soya sauce
8 tbs balsamic vinegar
2 tsp sugar
2 tsp brown sugar
2 tsp minced garlic
1 tbs butter

Method

Pat wings dry and toss with olive oil, salt and black pepper till well coated.  Set aside 15 minutes.
Preheat oven to 260 degrees celsius.
Arrange wings on 2 shallow trays (lined with foil), without crowding.  Put one tray in highest and the other in the lowest rack of the oven and bake wings until skin turns golden brown and crispy. If using whole wing, this should take approx 35 minutes. If using only mid-joints (as shown in the photos), then 25 minutes should be sufficient.

While wings are baking, prepare the Glaze and Sauce.
For Buffalo Wings Sauce, simply whisk all ingredients together in a bowl.
For Balsamic-Soy Glaze, combine soya sauce, vinegar, sugar and brown sugar, and boil in a saucepan on medium to high heat till thickened and somewhat reduced.  Add minced garlic and continue to boil for 5 minutes. Remove from heat and whisk in butter till melted and well-combined.

Remove trays from oven and set aside to allow wings to rest for 10 minutes before removing.
Divide the wings between 2 large bowls.  Toss one in the buffalo sauce and the other in the balsamic-soy glaze.

Share this:

  • Facebook
  • Twitter
  • More
  • Tumblr
  • Pinterest
  • LinkedIn
  • Reddit
  • Email

Like this:

Like Loading...

Tiger Prawn Pasta with Sun-dried Tomato and Black Olives

22 Wednesday Feb 2012

Posted by sue-ann in pasta, recipes, Tiger Prawn Sun-Dried Tomato Pasta

≈ Leave a comment

Tags

prawn pasta, sun-dried tomatoes

Pasta is one of those things we can whip up with very little preparation time and with just some basic ingredients which we’re likely to already have in our fridge.  And dried pasta stores well.  So I always stock up at least 3 different kinds. Certain shapes go better with certain sauces because of the way that the ingredients in the pasta sauce adheres to or gets picked up by the pasta, or because of their texture. But then it does boil down to personal preference.  At the moment, there’s some Spaghettini, Squid Ink Spaghettini, Tagliatelle, Parppadelle, Macaroni and Penne in my larder. The egg tagliatelle would go with cream sauces or egg sauces, whereas for aglio olioor white wine sauces, we’d use spaghettini. The kids prefer the shorter pastas, which I assume is because it’s just easier to eat.  Those tend to go well with tomato-based sauces.

We had some friends over for dinner last Saturday.  It was an impromptu thing we arranged on the day itself. After our morning picnic at Botanic Gardens (which was adjourned to Hort Park after it began to rain), we dropped by at my favourite supermarket. I’d already planned on making breaded chicken breasts seasoned in herbs and stuffed with bacon and cheese (my take on Chicken Cordon Bleu), with some salad and sweet mango on the side.  But the Tiger Prawns looked really compelling that day – so fresh, large and plump – so I decided we’d have them as well, in spaghettini with a sun-dried tomato and black olive sauce.

This pasta dish is easy enough to prepare on a week night. At the same time, it’s lush enough to have with a glass of wine when you feel like spoiling yourself or when you’re entertaining. Especially if you have fresh large Tiger Prawns like we did.

Ingredients

500g spaghettini
12-18 large tiger prawns (approx 800g)
2 whole garlic, chopped
4 large shallots, sliced
1 cup sun-dried tomatoes (steeped in oil), sliced
3/4 cup sliced pitted black olives
2 cans chopped/diced tomatoes (approx 550g in total), drained
2 handfuls of chopped basil leaves
4 sprigs Italian parsley, chopped
Grated Parmigiano Reggiano (Pecorino or Parmesan is fine too)
2-4 chili padis, seeds removed (2 if you want it mild, more if you want it more spicy) (optional)
1.5 cups olive oil (add a little more as you go, if necessary)
4 tbs butter
Salt and black pepper to taste

Method

Heat 2-3 tbs olive oil in a large skillet on medium-high heat.
Pat prawns dry, then place on skillet to cook, one side at a time, turning when they are cooked halfway through. Allow prawns to be seared, but reduce heat before they start to burn. Remove prawns with slotted spoon when they are just cooked through, and set aside.
Turn down heat.
Add remaining olive oil, butter, garlic and shallots to the skillet and saute till softened.
Add sun-dried tomatoes and saute till softened.
Add chopped/diced tomatoes, chili and black olives, and cook until sauce thickens.
Stir in chopped basil leaves.
Stir in prawns (including any drippings/juice) and season with salt and black pepper.
Meanwhile, bring large pot of water to a boil, with 3 tsp salt added.  Cook pasta until al dente (tender but firm), then drain.
Add cooked pasta to the skillet and combine with the sauce.
Dish onto plates, arranging prawns on top of pasta, and sprinkle with cheese and chopped Italian parsley.

Serves 6.

Share this:

  • Facebook
  • Twitter
  • More
  • Tumblr
  • Pinterest
  • LinkedIn
  • Reddit
  • Email

Like this:

Like Loading...

Home-made Char Siew

15 Wednesday Feb 2012

Posted by sue-ann in Char Siew, chinese, pork, recipes

≈ Leave a comment

Tags

char siew

A good day for me is usually one involving quality time with the kids, exercise, and some tinkering in the kitchen.  At the moment, I’m still high on endorphins from this evening’s run. I had a pleasant and fruitful day with the kids, and the Char Siew we made for dinner turned out exceptionally well.  So it’s been a good day.

I first made Char Siew some years back, when it was part of the menu at a family dinner I cooked to celebrate my mom-in-law’s birthday.  Back then, I only had a table-top oven which was relatively small in size. But it was a good microwave-convection combination oven, which in those days didn’t come cheap.  It was my first oven, and I have fond memories of learning how to bake and roast with it.  I’m glad it’s gotten a new lease of life in another household with someone who also enjoys cooking.  But I digress.

I remember wondering how I should make Char Siew, then looking for a recipe online.  That’s when I discovered Lily’s Wai Sek Hong, which is a useful resource for Chinese and Asian recipes.  This Char Siew recipe was originally based on Lily’s recipe, but I’ve experimented with it and tweaked it as I went along so the quantities and method aren’t the same anymore.  I actually think it’s pretty easy to make, and once you can do this, you probably won’t want to buy char siew from the neighbourhood roast meats stall again.

There are two ways you could cook this: If you want very succulent Char Siew, but without the charring, you can simply place it in a tray (line tray with foil first, otherwise it’ll be hell to clean) in the oven at 220 degrees celsius, first covered in foil for 15 mins, then remove the foil, return to the oven for a further 15 minutes, then glaze it and return to the oven for a further 12 minutes or until it the pork appears shiny.  The Char Siew turns out really juicy and tender this way, but you don’t really get any charred bits.

If you like it charred, then place the pork on wire rack fitted over a roasting pan (again, line pan with foil), add some water into the pan (about 1cm depth) and just roast on 230 degrees celsius covered with foil for 10 minutes, then, remove foil, glaze and continue to roast (uncovered) for another 20 minutes, checking to ensure it doesn’t burn.

I prefer the first method, as the meat retains much more moisture, and because the marinade and glaze don’t get burnt off as in the case with the second method, there’s much more flavour as well.  What I’m posting is the first method, but if you like your Char Siew charred, you could try the second method I’ve mentioned.

Ingredients

800g pork shoulder or pork loin (or tell your butcher you’re making char siew)

For Seasoning:
3 tbs Hoisin sauce
1.5 tsp garlic powder (or finely-chopped garlic)
3 tsp soya sauce
1/2 cup sugar
1.5 tbs Hua Teow Chiew (Chinese Wine)
3/4 tsp Five Spice Powder
1/2 tsp salt
1 tsp cracked black pepper

For Glaze:
1.5 tbs dark soya sauce
1.5 tbs honey
1.5 tbs cooking oil

Method

Mix all seasoning ingredients together and marinade pork in it for about 1-2 hours.
Preheat oven to 220 degrees celsius.
Place pork in a tray (line tray with foil first) together with all the marinade and cover tray with foil, then put in the oven for 15 mins at 220 degrees celsius.
Remove the foil covering and return to oven for a further 15 minutes.
Mix glaze ingredients together in a bowl and brush glaze all over pork thoroughly, then return to oven for a further 12 minutes or until the pork appears shiny.
Let stand for 20-30 minutes before cutting into slices and serving.

Share this:

  • Facebook
  • Twitter
  • More
  • Tumblr
  • Pinterest
  • LinkedIn
  • Reddit
  • Email

Like this:

Like Loading...

Salmon and Leek with Fusilli: Tasty, Quick and Healthy

11 Saturday Feb 2012

Posted by sue-ann in pasta, quick and easy, recipes, salmon

≈ 2 Comments

Tags

salmon pasta

During weekends, we usually spend the day out with the kids, and if there are no dinner plans, I usually prefer to cook something simple at home, rather than da bao (takeout).  We used to think nothing of it before the kids came along, but this has become somewhat of an exception now as I’ve become more conscious of what goes into our diets.

Today, after a morning of go-karting at West Coast Park, we had a fast food lunch as a treat to the kids. So all the more I thought we ought to balance things out a little with a relatively healthy dinner.  Feeling tired and a little lazy, an easy one-dish pasta meal seemed an appealing option. There is usually some Salmon fillet in the freezer, and there is always dried pasta in the larder.

Salmon and Leek with Fusilli is one of the current quick and easy staples from my kitchen.  It’s easy to prepare, tasty, convenient to eat if you’re in a hurry, and best of all, makes for a healthy meal.  It’s not anything special, but I just thought I’d share this as an easy meal you could prepare on a week night.  Takes about 30 minutes.


Ingredients

Approx 600-700g salmon fillet, skin removed
350g dried fusilli (pasta spirals)
1 whole garlic
1 stalk leek
1 cup olive oil
Chopped Dill leaves (either fresh or dried)
Chopped Italian Parsley (either fresh or dried)
Pot of water for cooking pasta
Salt to taste
Method

Put a large pot of water to boil.  Add 2 tsp salt.
Cut salmon into 1 inch cubes.  Season with salt. Cook pasta in the pot of boiling water. Remove and drain once cooked.
In the meantime, heat olive oil in a large skillet on medium high heat. Cook salmon, first on one till browned, then turning over (adjust heat if necessary), until just cooked through. Remove with slotted spoon and set aside.
Turn heat to low. Saute chopped garlic until cooked but not brown. Add leek and saute till just softened.
Return salmon to skillet and toss gently for a couple of seconds.
Turn off heat, add drained pasta to the skillet and toss gently with the other ingredients, adding chopped dill, parsley, and salt to taste. Be careful not to break up the salmon cubes.
If you like, top with freshly grated cheese (I like Pecorino).

Serves 4.

Share this:

  • Facebook
  • Twitter
  • More
  • Tumblr
  • Pinterest
  • LinkedIn
  • Reddit
  • Email

Like this:

Like Loading...

Nonya Laksa Recipe

07 Tuesday Feb 2012

Posted by sue-ann in Nonya Laksa, recipes

≈ 1 Comment

Tags

laksa, nonya, Singapore food

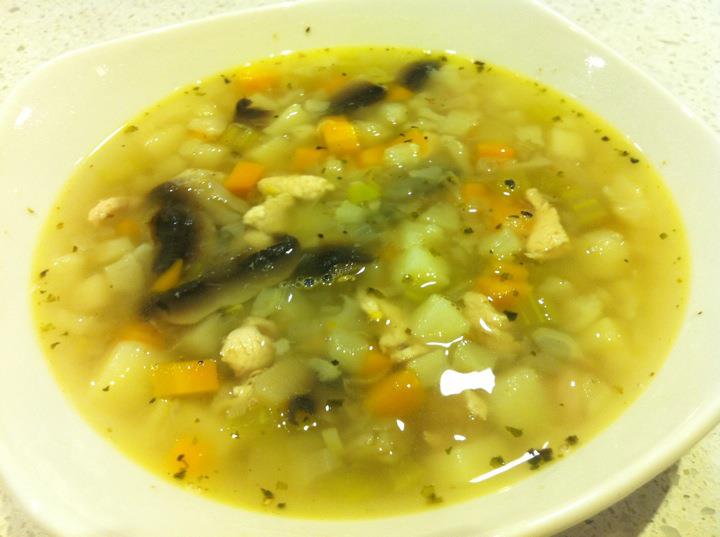
So here I am with the recipe for Nonya Laksa.  This is an extremely tasty and addictive dish, and although it may sound daunting to make since a number of steps are involved, you will find the result well worth it.  It is one of those dishes you shouldn’t rush, and it will definitely taste better with some TLC.  I cooked it in fairly large quantities, so the recipe here is based on a reduced portion. It would make 5 servings.  I really hope you will enjoy making and eating this as much as I did!

Ingredients

620g thick rice noodles (chu mee fen or chor bee hoon)
500ml coconut milk
1.8L water
400g prawns (medium) (approx 4 prawns per person)
2 fish cakes (each of approx 12cm in length), sliced
3 pieces tau pok (about 6cm x 6cm)
150g beansprouts
10 quail’s eggs or 3 chicken eggs, hard boiled and shelled
200g fresh blood cockles (with shells) (optional)
10 stalks laksa leaves
Rock sugar to taste
Salt to taste

For the Rempah (paste)

40g hei bee (dried shrimp)
1 whole garlic
8 shallots
1 small piece turmeric (approx 1cm x 1.5cm)
1 piece galangal (approx 3cm x 3cm)
3 candlenuts, finely pounded
1 stalk lemongrass
1 + 1/4 tbs belacan
10 dried chillies
Cooking oil

Method

Grind rempah ingredients in a food processor into a fine paste. Add about 2 tsp of finely chopped laksa leaves (from about 2 stalks) into food processor and whizz for a few seconds together with the paste.
In a wok, heat up 2-3 tbs of cooking oil, and fry paste until its colour darkens.  If it gets too dry before this happens, add a little oil.  Set aside rempah once it is done.
In a large stock pot, bring 1.8L of water to a boil and add the prawns, with shells on, then simmer till the prawns are cooked, remove quickly and refresh with cool water.  Once cooled, shell prawns and return shells and heads into stock pot. Set aside the prawns.  Bring pot to a boil, then lower heat and simmer about 1.5 hours.  Add a handful of laksa leaves to the stock pot (from approximately 3 stalks), and allow to simmer for another half hour.
While stock is simmering, prepare the other ingredients:
Slice fish cakes.
De-vein cooked prawns.
Hard boil the eggs, then shell them, and if using chicken eggs, slice them (quail’s eggs may be served whole).
Blanche the tau pok in a pot of boiling to remove some oil, then drain and slice them.
Rinse cockles thoroughly in a basin of cool water, changing the water until the water turns clear.  Drain.  Place cockles in a basin or small pot and pour boiling water over them and leave for a minute before draining them.  Refresh with cool water to prevent the cockle flesh from continuing to cook and becoming too tough.  Remove the flesh and set aside. Discard shells.
Blanche beansprouts quickly and drain.
Finely chop the remaining laksa leaves (you should have about 5 tsp)*.
Cook rice noodles in a pot of boiling water, refresh and drain.
Strain stock after it has been allowed to simmer for 2 hours, and return to stock pot.
Add rempah to the stock and bring to a boil, then lower heat and simmer till oil surfaces. Skim. Lower heat.
Add coconut milk (a little at a time), bring to a boil, the lower heat to simmer for a few minutes.
Add rock sugar and salt to taste.
If necessary, add more coconut milk.
Place a portion of the cooked rice noodle into a bowl. Arrange prawns, tau pok, beansprouts, cockles and eggs over the noodles and then pour some gravy over it. Sprinkle with 1 tsp of chopped laksa leaves and serve with sambal if available.
* If you are not able to get the amount of laksa leaves required in this recipe, try to ensure that you have at least 4-5 tsp of chopped laksa leaves for sprinkling over the individual bowls, and omit the laksa leaves in the rempah and stock if you have to.
(Edited 8/02/12)

Share this:

  • Facebook
  • Twitter
  • More
  • Tumblr
  • Pinterest
  • LinkedIn
  • Reddit
  • Email

Like this:

Like Loading...

Hearty Chicken and Vegetable Soup

24 Tuesday Jan 2012

Posted by sue-ann in Hearty Chicken and Vegetable Soup, quick and easy, recipes, soup

≈ Leave a comment

Tags

chicken soup

Our stomachs were never meant to take the abuse of Chinese New Year feasting. I have to admit that it’s entirely self-inflicted, but it’s what we do. We bond over food.

Tonight, after three full days of feasting – not including the week or so of constant snacking on pineapple tarts, kueh lapis, and assorted other cookies (I so need to intensify my exercise regime now!) – I’m finally rid of the heartburn.  I’d decided we should have something simple for dinner this evening, something to calm the tempest in our bellies.  So I went with some wholesome Chicken and Vegetable Soup.  Easy, healthy and delicious.  I highly recommend this!


Ingredients

1 whole chicken, skin removed, meat diced, carcass reserved for stock
1 garlic, peeled but with last layer of skin left on, top sliced off
2 sprigs fresh tarragon
Handful of fresh Italian parsley
1 stalk lemongrass, white part bruised
1 bay leaf

1 big carrot, diced
2 stalks celery, diced
2 stalks leek, chopped roughly
1 brown onion, chopped roughly
1/2 small cauliflower, diced
5 medium potatoes, peeled and diced
200g fresh button mushrooms, sliced

2 tbs butter
1 tsp black peppercorns
1 tsp dried mixed Italian herbs
Salt
Truffle oil for drizzling (optional)

Method

Make stock: Put carcass, fresh herbs, lemongrass, bay leaf and garlic in a pot with 2L water, bring to boil and simmer 20 minutes.
Skim off scum, remove carcass, herbs and garlic or strain stock through sieve.

Season diced chicken with 1 tsp salt, set aside 10 minutes.
Add diced chicken, veg and mushrooms to stock and bring to boil, then simmer on low heat until potatoes and carrots are softened.
Add dried herbs and peppercorns, simmer 5 minutes.
Add butter and simmer another 5 minutes, then turn off heat.
Check seasoning.
Scoop into bowls.  If available, drizzle with truffle oil. Serve with buttered warm rolls.

Makes about 8 bowls.

Share this:

  • Facebook
  • Twitter
  • More
  • Tumblr
  • Pinterest
  • LinkedIn
  • Reddit
  • Email

Like this:

Like Loading...

Lemongrass and Ginger Iced Tea for the Scorching January Afternoons

19 Thursday Jan 2012

Posted by sue-ann in drink, Lemongrass and Ginger Iced Tea, recipes

≈ 2 Comments

Tags

lemongrass tea

The kind of sunny, scorching weather which January has brought with it, has often made me dream of lounging by the beach somewhere in Thailand, dosing off under the shade of coconut trees, feeling the balmy breeze against my skin, and looking forward to Tom Ka Gai at dinnertime. But since I’m not about to be jetting off anywhere, I thought the next best thing would be to cool off on the terrace with a glass of Lemongrass and Ginger Iced Tea.

Lemongrass is believed to have medicinal properties.  It’s used in traditional remedies in Asia, for treating fevers, coughs and colds.  It is also believed to aid digestion, cure insomnia, keep skin healthy, act as an antioxidant, keep cholesterol levels down, inhibit heart disease and even induce programmed cell death in cancer cells!

But quite apart from all of that, I love lemongrass for what it is. I love its fresh, citrus-like fragrance, which always manages to relax me. I love how it lends that tangy, exotic flavour to cooking.  Most of all, I love how a whiff of lemongrass reminds me of luxuriating at spa resorts, where time seems to stand still.So if you’re thinking of beating this heat with a glass of Lemongrass and Ginger Iced Tea yourself, here’s the recipe.  Enjoy!

Ingredients

4 stalks of lemongrass, white part only, first 2 outer leaves removed, bruised and sliced thinly
1 gob of fresh ginger (approx 1 inch x 2 inches), peeled and sliced
1/2 cup sugar
1 cup water

2 tea bags (any black tea, or you could even try green tea if you like)
1 cup boiling water
1.5 cups cool/cold drinking water
Ice cubes
3 lemongrass stalks for garnish, outer 2 leaves removed and white part bruised

Method

In a pot, boil lemongrass and ginger in 1 cup of water for about 10 minutes, then add sugar.
Cover pot and leave aside for about 30 minutes, or leave overnight in fridge.
Strain the lemongrass and ginger syrup, pressing on the ingredients to extract the flavour.
Let teabags steep in 1 cup of boiling water for 5 minutes, then add 1.5 cups cool/cold water, and remove and squeeze out teabags.
Mix syrup with tea, pour out into 3 glasses.
Put a stalk of lemongrass into each glass and add ice cubes.


Share this:

  • Facebook
  • Twitter
  • More
  • Tumblr
  • Pinterest
  • LinkedIn
  • Reddit
  • Email

Like this:

Like Loading...
← Older posts
Newer posts →

Enter your email address to follow this blog and receive notifications of new posts by email.

Join 17 other subscribers

Visit my facebook page for more pictures from my kitchen

Visit my facebook page for more pictures from my kitchen

Recent Posts

  • Super-moist Nutella and Chocolate Banana Bread
  • Char Kway Teow: Another Experiment in Hawker Fare
  • Lamb Chops rubbed with mint and spices
  • Black Pepper Garlic Striploin Roast, and hello!
  • Deliciously Easy Yet Healthy: Chicken Casserole with Chopped Vegetables

1000 Hits and Counting apple Apple Pie bakes beef Carrot Walnut Cake celebrations Chai Latte Char Siew Chatting Up Your Fruiterer chicken Chicken Rice chicken wings Chicken Wings with 1/2 the Guilt chinese Chinese home-style cooking Chinese Roast Duck drink duck eggs family fish Fish Mee Sua Soup french fries fried rice fruit hawker fare Hearty Chicken and Vegetable Soup Japanese kids Lemongrass and Ginger Iced Tea life Lovesick for Ipoh Hor Fun Nonya Laksa notes and messages one-dish meals pasta Pepper Grilled-Steak with Chopped Summer Salad pie pineapple Pineapple Fried Rice pork Pork Chops potatoes quick and easy recipe recipes roasts Roast Turkey roti john running salad salmon shortcrust pastry sides soup steak Steak and Salmon on a Whim Tau Yew Bak Thai Tiger Prawn Sun-Dried Tomato Pasta travel turkey Uncategorized Vermont Curry

COPYRIGHT 2012

Blog at WordPress.com.

Privacy & Cookies: This site uses cookies. By continuing to use this website, you agree to their use.
To find out more, including how to control cookies, see here: Cookie Policy
  • Follow Following
    • lifeisdelish
    • Already have a WordPress.com account? Log in now.
    • lifeisdelish
    • Customize
    • Follow Following
    • Sign up
    • Log in
    • Report this content
    • View site in Reader
    • Manage subscriptions
    • Collapse this bar
 

Loading Comments...
 

    %d bloggers like this: