• About Me

lifeisdelish

lifeisdelish

Category Archives: recipes

Steak and Salmon on a Whim

07 Saturday Jan 2012

Posted by sue-ann in quick and easy, recipes, salmon, steak, Steak and Salmon on a Whim

≈ Leave a comment

This was a quick and easy Steak and Salmon dinner we had some weeks back, decided upon on a whim at the supermarket because both the salmon fillet and beef tenderloin happened to be marked for “Quick Sale”.  So we grabbed four of each. We actually eat quite a bit of salmon at home because it’s just such a delicious fish, packed with Omega-3, and pretty easy to prepare. Anyway, we all thoroughly enjoyed this meal.  And the satisfaction I got out of it was doubled by the fact that it was done on such a whim.  We had a side of boiled potatoes tossed in sour cream and bacon bits too.

This can take under 45 minutes if you are a fairly confident multi-tasker, and you have a big skillet in which to cook all four steaks at the same time:

Boil a pot of water, with 1 tbs of salt added.
Pre-heat oven to 220 deg celsius.
Pat steaks dry with paper towels, rub salt, black pepper and about a teaspoonful of chopped garlic over each steak. (I usually have some chopped garlic in the fridge stored in an airtight glass jam jar).
Rub salt, olive oil and dried dill over the salmon fillets.
Heat skillet with 2 tsp olive oil, over medium-high heat.
Put 4 or 5 potatoes into the pot of boiling water.  Leave them to cook while you deal with the salmon and steak.
Arrange salmon fillets in a oven-proof dish and bake at 220 deg celsius for approximately 8-10 minutes, then turn oven up to 240 deg celsius for approximately 4-6 minutes so that the edges and skin brown (How long it takes depends on thickness of the fillets and also how you like your salmon done. I like mine done medium, with the insides just flaking yet moist. The one in the picture is well-done).
While the salmon fillets are in the oven, you can grill your steak in the skillet.  Cook steaks one side at a time, approximately 3-4 minutes on each side, for medium done-ness.  (Turn down the heat once the steaks are browned if you don’t want them too charred).
Remove potatoes from pot once you can prick a fork into them without much resistance, then peel skins once they’re cool enough to handle, and halve or quarter them. Toss potatoes in sour cream, top with bacon bits (this was one of those times we used Hormel) and chopped chives.
Sprinkle salt and black pepper over the steaks before serving.
Sprinkle black pepper over salmon fillet.
Serve with mesclun mix and cherry tomatoes, drizzled with olive oil and balsamic vinegar.  We used a Raspberry Balsamic Vinegar reduction from a bottle we got from Jones the Grocer, which was pretty good.

Advertisement

Share this:

  • Facebook
  • Twitter
  • More
  • Tumblr
  • Pinterest
  • LinkedIn
  • Reddit
  • Email

Like this:

Like Loading...

Fish Mee Sua Soup: A Healthy Dose of Comfort Food for the Post-Festive Season

04 Wednesday Jan 2012

Posted by sue-ann in Chinese home-style cooking, fish, Fish Mee Sua Soup, one-dish meals, recipes

≈ 3 Comments

My friend C, who’s taking a break from work to spend time with her toddler, has asked that I share some Chinese home-style dishes she can prepare for the family. I know what it’s like having to cook dinner while minding a small child, because we only had live-in help about 3 years after the daughter was born. Before that, quick, healthy meals which required minimal cleaning up were the order of the day.

Now weekday meals are usually left to W, our Filipina helper. I go through the week’s menu and shopping list with her, and unless we feel like having something special, I don’t have to bother her in the kitchen for the rest of the week. As a source of reference for W, we keep a couple of ratty, torn notebooks containing scribblings of recipes I’ve given her over the years.  Most of the time, it’s comforting Chinese home-style dishes which I am grateful to be able to come home to.

One of my comfort foods is Mee Sua Soup.  Pork Rib and Yam Mee Sua Soup and Fish Mee Sua Soup are part of our regular diet at home. Mee Sua is a fine rice noodle with a very delicate, smooth texture.  I especially love the way it glides down the throat so wonderfully when eaten as part of a soup dish.  It  also has a sweeter and more delicate taste as compared to bee hoon.

We haven’t had much Chinese home-style cooking in the past few weeks.  So yesterday’s lunch of Fish Mee Sua Soup was such a welcome sight to me.

Fish Mee Sua Soup topped with fried shallots and garlic 

This comforting one-dish meal is tasty, healthy, easy to prepare, and entails minimal kitchen-cleaning afterwards.

Ingredients

6 lumps of Mee Sua
350 grams Batang (or Mackerel) fillet, sliced
100 grams minced pork
8 cups chicken stock (or 4 cups chicken stock from a carton, plus 4 cups water)
Fresh ginger, peeled and cracked (approximately 2.5 to 3 inches in length)
1 whole garlic, last layer of skin left on, and top sliced off
2 tbs of Kiam Chye (salted mustard leaves), rinsed and cut into thin strips
1 whole tomato
Handful of Chye Sim or other Chinese green leafy vegetable
Handful of Inoki or Shitake Mushrooms (optional)
Fried Shallots and Garlic, Spring Onion and Chinese Parsley (coriander) for topping/garnish
1 tbs Soya Sauce for seasoning pork
2 tsp Sesame Oil for seasoning pork
2 tsp Sesame Oil for fish seasoning
1 tbs Hua Teow Chiew (Chinese wine)
Salt and pepper

Method

Season the minced pork with sesame oil, soya sauce and white pepper.
Season fish slices with salt, hua teow chiew and sesame oil.
Bring stock to a boil in a pot with the ginger, garlic and kiam chye.
Put seasoned minced pork in a large bowl, add about a ladle of stock into the bowl and quickly stir with a fork or chopsticks to separate the minced pork into loose bits as they cook partially, then pour the mixture into the pot to cook, stirring gently.
Add mushrooms into the pot to cook, then remove and set aside.
Add fish slices into the pot and remove and set aside when just cooked (submerge into the pot a small sieve with a handle and cook the fish over it, so the slices are easier to retrieve).
Add tomato into the soup and simmer perhaps 2-3 minutes.
Season soup with salt and pepper if necessary.
In a separate saucepan/pot of salted boiling water, blanche the chye sim till just cooked. Remove and set aside.
Cook mee sua in a pot of boiling water, one portion at a time, over a sieve, gentling moving the noodles apart with a fork or chopsticks to keep them from sticking together (1 to 1.5 lumps mee sua per portion would be about right).
Once mee sua is tender (which doesn’t take long), remove from pot by lifting the sieve (hence draining it at the same time), transfer into a bowl. Put one portion of fish, mushroom and vegetables over the mee sua, in each bowl, and pour soup over it.
Top with fried shallots and garlic and garnish with spring onion and Chinese parsley and serve with a small saucer of chill padi and soya sauce.

Serves 4.

Note: You could add a tbs of toasted hei bee (dried shrimp) to the stock for even more flavour (and omit the kiam chye), or add some dried seaweed to the soup.

Share this:

  • Facebook
  • Twitter
  • More
  • Tumblr
  • Pinterest
  • LinkedIn
  • Reddit
  • Email

Like this:

Like Loading...

Pork Chops with Garlic Herb Crust

23 Friday Dec 2011

Posted by sue-ann in pork, Pork Chops, recipes

≈ Leave a comment

Today my Dad brought me a 4kg Angus Ribeye Roll and 4.5kg worth of French-cut lamb racks.  My heart almost palpitated with excitement as I opened up the bag to take a look at them.  Beautiful!  They are now parked in the fridge together with the 6kg turkey which is thawing.  One would think I am planning to feed 40.  But it’s actually closer to 20.  Can’t wait to start cooking!
I also learnt something today. You know, other than the Hainanese kind., the H and I are not fans of pork chops. Unlike beef, pork has to be eaten well-done, so it seems that most of the time, pork chops turn out to be somewhat tough.  However, today I discovered that marinating pork chops in a milk brine for an hour before cooking will make them juicy and tender.
As I said, the kids are into potatoes at the moment, so I’ve been thinking up mains to go with potatoes.  They were so taken by the Chicken Cordon Bleu we had the other day that they were hankering for more.  So I thought I’d do some breaded pork chops today.

Breaded Pork Chops with Sauteed Potatoes and Chinese Greens

I used the Pork Chops and Applesauce recipe at epicurious.com, but I had neither apples nor bottled applesauce so we had it neat, with sliced potatoes sauteed in butter, and Chinese greens stir fried with olive oil.  I knew from the recipe that the pork chops would be flavourful because of the garlic, rosemary and thyme which went into the breadcrumb mix, but we were really very pleasantly surprised at how juicy and tender the meat was.  I think we can attribute this to the milk brine bath.

I had to tweak the recipe since we were only having 6 pork chops.  I also used dried breadcrumbs (panko) instead of fresh, and I upped the minced garlic (doubled it) because that’s what I always do – up the garlic.  I also felt the need to omit the butter because, based on the thickness of the pork chops, I thought it would be difficult to get the meat cooked through without burning the butter and blackening the crust.  The cooking time had to be adjusted as well – I cooked them for about 6 minutes on each side on medium heat, which was perfect.  So in the end, this was it:

Recipe for Pork Chops

Ingredients
2 cups milk
3 tsp salt
6 (1/2 inch) pork chops
2 cups panko (dried breadcrumbs)
2 tbs minced garlic
2 tsp chopped fresh rosemary or 1/2 tsp dried, crumbled
2 tsp chopped fresh thyme or 1/2 tsp dried, crumbled
3-4 tbs olive oil

Method
Marinate Pork Chops:

Stir milk and 2 tsp salt in a shallow dish, then add pork chops.  Marinate, covered and chilled, turning over once, for at least 1 hour.

Fry Pork Chops: 
Stir together bread crumbs, garlic, rosemary and thyme, and 1 tsp salt in shallow bowl.
Lift pork chops from milk one at a time, letting excess drip off and dredge in breadcrumbs, lightly patting crumbs to help adhere, then transfer to a tray lined with baking paper, arranging in one layer.
Heat 2-3 tbs olive oil in a skillet over medium heat, then saute pork chops in 2 or 3 batches, without crowding, turning over once, until golden brown and just cooked through, approximately 6 minutes per side. (add more oil to skillet if necessary).

Share this:

  • Facebook
  • Twitter
  • More
  • Tumblr
  • Pinterest
  • LinkedIn
  • Reddit
  • Email

Like this:

Like Loading...

Eating Potatoes

20 Tuesday Dec 2011

Posted by sue-ann in french fries, potatoes, recipes, sides

≈ Leave a comment

You  know, we say “jiak kentang” (literally, “eat potatoes”) when we refer to a Chinese person who speaks only English and hardly any Chinese. Well, we say that of our kids a lot, and now it has actually happened.  After eating steamed rice all their lives, they now say they don’t like it.  Instead, they like potatoes. And since I prefer to feed people what they like, I try to accommodate this.

But I’m not prepared to eliminate rice from our menu altogether, because I personally find it hard to get through more than a week or so without a bowl of steamed rice.  When we were holidaying in Victoria this June, I needed a fix after about 10 days, so the moment we arrived in Melbourne, we went across Bourke Street to Flower Drum for dinner.  The H and I had 2 bowls of steamed rice at dinner that evening, at AUD4.00 each.  Ludicrous to pay AUD16.00 to eat steamed white rice, but it never tasted so good!

Anyhow, these days we eat a lot of Russet Potatoes at home.  Baked Jacket Potatoes are in high demand, topped with sour cream, bacon bits and chives.  It’s so easy to do – wrap in foil and bake at 240 degrees celsius for approximately 45 minutes – that I am tempted to feed this to them at every meal. My skinny 6-year old keeps going at those jacket potatoes with sour cream long after the meal is over for everyone else.

Boiled Russet Potatoes with sour cream and bacon bits

If I don’t have 45 minutes, I boil the potatoes instead.  I put the potatoes in a pot and cover with water, add perhaps 2 tsp of salt to the water for every 6 potatoes, then boil for approximately 15 minutes till cooked. Then I peel, quarter and toss them in sour cream, top with bacon bits and chives (or spring onion).  I prefer to make my own bacon bits, but if I don’t have time or don’t have any bacon in the fridge, then I use Hormel Real Bacon Bits.  I stay clear of those bottles of purported bacon bits which taste nothing like bacon.

Russets are also good for French Fries.  I’d struggled in the past, making batch after batch of Fries which turned out rigid and crispy at first, but then went limp and flaccid within a couple of minutes, much to my disappointment . During each of those episodes, I’d either used the wrong kind of potatoes, failed to rinse them thoroughly enough, didn’t soak them in iced water for long enough, or all of the above.  I’ve learnt that making good fries takes time.

French Fries
Recipe for French Fries

First of all, use Russet Potatoes.  Peel and cut them into 1/4 inch thick batons (or keep the skins on if you like, just as I’d done in the picture above. The skins are nutritious too). Rinse them about 3-4 times thoroughly in water, changing the water until the water turns clear.  Then put them in a big bowl, cover with cold water and ice cubes, and place in the fridge for at least an hour or overnight.

Heat cooking oil at low-medium heat in a big pot or wok (the oil should be about 3-inches deep).

Remove potatoes from the fridge, drain off the water and pat them dry thoroughly with a tea towel.

Turn up heat to medium-high and add fries, a handful at a time, and cook in the hot oil till they turn blond, soft and limp. Then remove and drain on paper towels and let it rest for about 10 minutes at least.

When ready to serve, re-heat oil on medium-high, then put the potatoes into the hot oil and fry again, until golden brown, puffed and rigid.

Transfer to tray or platter lined with paper towels and sprinkle with salt, then serve.

Well, no deep-frying is happening in my kitchen at the moment. Our helper is on Christmas home leave, and I am averse to too much cleaning up.

Recently we had some friends come over for dinner, and one of them, KS, began to sautee in butter some of the boiled potatoes we had.  I’d originally intended to just toss them in melted butter and some chopped fresh herbs.  But KS’s version was a hit with the kids and we’ve had it a couple of times since.  For this, I prefer  to use Red Potatoes or what they call “New Potatoes” in the supermarket.

Recipe for Boiled and Sauteed Potatoes

Boil Potatoes with skins on till cooked, then peel and cut into halves or quarters.

Heat a tablespoon of butter in a skillet or pan on low-medium heat, and once foam starts to subside, put potatoes in and sautee, one side at a time until browned on each side.

Add salt to season, then sprinkle with fresh chopped Italian Parsley (or fresh Dill if you like).

Boiled and Sauteed Potatoes

You can cook and serve potatoes with almost anything, including, well, steamed rice. So we try never to run out of potatoes at home. But while boys have the amazing ability to put away potatoes like nobody’s business and still stay skinny, the same cannot be said of a grown woman like me.


Share this:

  • Facebook
  • Twitter
  • More
  • Tumblr
  • Pinterest
  • LinkedIn
  • Reddit
  • Email

Like this:

Like Loading...

Pineapple Fried Rice

13 Tuesday Dec 2011

Posted by sue-ann in fried rice, pineapple, Pineapple Fried Rice, recipes, Thai

≈ 2 Comments

Reverse-engineering our food is a skill which is somewhat taken for granted in my family. When we try a new dish that’s good, Mom is likely to start a discussion on what ingredients had been used and how it had been prepared.  And then maybe a week or two later, that dish would be home-cooked for us. Mom comes from that generation of cooks whose recipes are stored in the head.  Nobody seems to write anything down. You work with gut feel and instinct. And a whole lot of guess-timation, trial and error are involved in the process.  And as far as my mom is concerned, it is rarely too late to rectify whatever it is you are cooking.

It’s been pretty much like that for me. I’d eat something yummy, and automatically think about how I’d cook it.  But I haven’t developed the habit of making proper notes. So there are times when I actually forget how I’d cooked something previously. And I end up having to re-invent it.  Or wing it.  Depends on how you choose to see it, I suppose. But I am getting a little better. These days I make scribblings of ingredients at the very least. Although quantities still tend to be estimates, they are usually quite accurate.

I love the challenge of experimenting with recipes which are new to my kitchen. I’d suddenly get it into my head that I just have to cook say, Beef Rendang. Or Laksa.  Typically, I’d do a little research and check out a couple of recipes, before I decide on how I’d do mine. On one of those occasions, it was Pineapple Fried Rice.  So I called my fruiterer, and off I went to pick up a sweet, fresh pineapple.

The Pineapple Fried Rice based on the recipe here is very tasty – sweet and savory at the same time, and the rice is soft and moist.  I’m not sure if you can call it authentic Thai Pineapple Rice, but it is delicious all the same.  It’s relatively straightforward, not difficult to do, plus the good news is that for this one, I actually made notes while the recipe was still fresh in my head.

Ingredients

4 cups rice, cooked and cooled
250g chicken thigh meat, diced
1 cup diced lap cheong (Chinese Sausage), skin removed
20-25 medium sized prawns
1 cup fresh, sweet  pineapple (from 1 small pineapple), roughly chopped, shell reserved
1/2 a big carrot, diced
1 cup green peas
3-4 tbs chopped garlic
1 brown onion, finely chopped
2 tbs curry powder
3-4 tbs fish sauce
3-4 tbs soya sauce
4 tbs cooking oil
Salt and pepper to taste

Method

Heat oil in wok on medium-high heat, fry garlic for perhaps 3 minutes, followed by onions, and cook till fragrant but not brown.
Add lap cheong and cook till edges are slightly charred.
Add prawns and stir fry till they just turn all pink, then add curry powder, fish sauce and soya sauce.
Mix well, add rice, peas and pineapple and stir till well-combined.  With a spatula, press down on the rice so the grains separate.
If desired, add salt and pepper to taste or adjust seasoning.
Serve in pineapple shell and garnish with chilli and coriander.

Serves 5.

Share this:

  • Facebook
  • Twitter
  • More
  • Tumblr
  • Pinterest
  • LinkedIn
  • Reddit
  • Email

Like this:

Like Loading...

Apple Pie

12 Monday Dec 2011

Posted by sue-ann in apple, Apple Pie, bakes, pie, recipes, shortcrust pastry

≈ Leave a comment

My first foray into baking was either when I made Butter Cupcakes or Chocolate Chip Cookies with my sister.  I can’t remember which it was now, but that was some three years back.  It never really took off with me, and it was only recently that I started to bake more regularly. So I consider myself a relative newbie to baking, where measurements have to be precise, and failing to use the proper technique could actually result in disasters of varying degrees. But please don’t let me put you off baking, because as with all things, it’s really all about getting enough practice. I have tried to stick to tried and tested recipes so far, and save for some small modifications here and there, have yet to reach a level of competence where I can come up with my own.

About two years ago, I chanced upon a recipe for Apple Pie in the Life! section of The Straits Times.  Now, Apple Pie seemed like something so basic.  I mean, how could I metamorphosize into a domestic goddess if I couldn’t even make Apple Pie, right?  The recipe seemed manageable enough.  We were having family over for dinner that evening, and so, as an afterthought, I decided to make Apple Pie for dessert. According to the H, this is exactly the kind of gung-ho attitude I have towards cooking which creates unnecessary stress for myself.

Anyway, I found myself at my dining table about two hours later, sweating and swearing over shortcrust pastry dough, which refused to roll out the way it was supposed to, despite my best efforts.  Why was it sticking to the rolling-pin and breaking up into bits and pieces? I blamed it on our humid weather. I blamed it on the fact that my hands were too warm because I was too excited.  I blamed it on the dining table whose surface was just not meant to accommodate the rolling out of any sort of dough. What was I thinking anyway?  In the midst of all this, my friends M and M, twins, dropped by to pick something up. I asked hopefully – desperately, I should say – if they had any idea what I ought to do.  In response, they provided some encouragement and moral support.

After experimenting with various methods (if we can call it that), and getting impatient with the non-cook, non-baker H for making suggestions which I was sure would not work, I took up one of his suggestions and put the ball of dough between two sheets of baking paper and ran the rolling-pin over it.  And that did the trick.  Because, as I have now come to learn, that is how it is supposed to be done.  Duh.

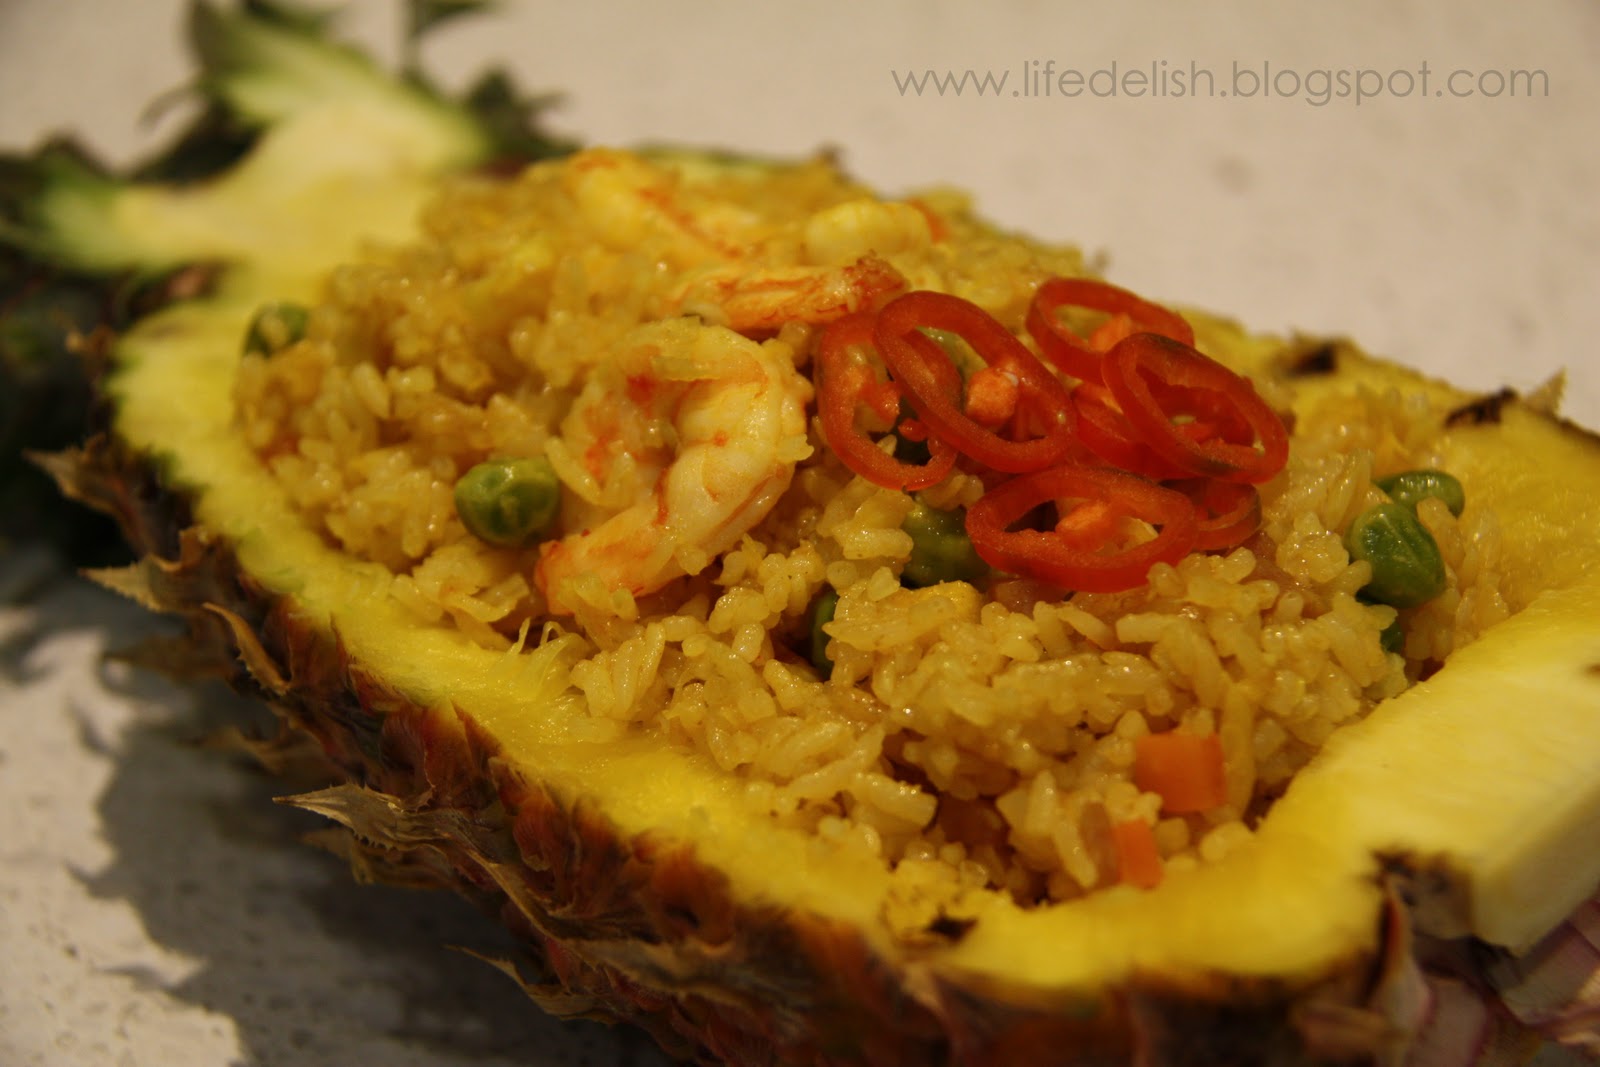
The filling was easy enough, and in the end, the pie wasn’t bad at all.  So here’s the recipe for all you aspiring domestic goddesses:

Apple Pie

Ingredients

Shortcrust Pastry

(Note: The quantities shown here will produce a very thin crust, and if you’d like something more to bite into – I’m quite sure you would cos the crust is quite yummy – then up the quantities shown here by about 20%)

250g plain flour
4 Tbs caster sugar
150g cold butter chopped into cubes
2-3 Tbs ice-cold water
3 Tbs finely chopped macadamia nuts (optional)

For Pie-filling and top crust

8 large apples, peeled, cored and sliced
2 Tbs water
6 Tbs caster sugar
2 Tbs grated lemon rind
1/2 tsp ground cinnamon
1 egg, beaten

Method

Pastry

Mix flour, sugar and butter in large bowl.  Rub together with fingers until pastry resembles fine breadcrumbs.

Add just enough cold water to combine everything.  Knead slightly, form into a ball, then wrap in cling film and place in the fridge for 30 minutes or more.

Roll out two-thirds of the pastry dough on lightly-floured surface, reserving the other third in the fridge for the top crust.  (Remember to save yourself the sweat – roll out the dough between 2 sheets of baking paper).

The dough should be rolled out to such a size and shape that will allow it to cover the bottom and sides of a 1.5-inch high, 20cm-diameter round baking dish. Lay the rolled-out dough onto the pan, with sides coming up a little higher than the edge of the dish. (It has to be rolled out pretty thinly to fit).

Sprinkle chopped macadamia nuts onto pastry base.

Place pastry back in the fridge while apple filling is prepared.

Filling

Put apples and water in large frying pan, cover and simmer gently, shaking pan gently occasionally, until apples start to become tender.

Stir in sugar, lemon rind and cinnamon and remove from heat to cool.

Pre-heat oven to 200 degrees celsius.

Remove chilled pie case from fridge and pack cooled filling into it.

Roll remaining third of dough into a round the size of the pie dish top.  Brush edges with a little water then press it together with the sides of the pie case to seal.  Cut some slits in the top, and brush with beaten egg, before placing in preheated oven at 200 degrees celsius to bake for at least 30 minutes until top is golden and crisp.

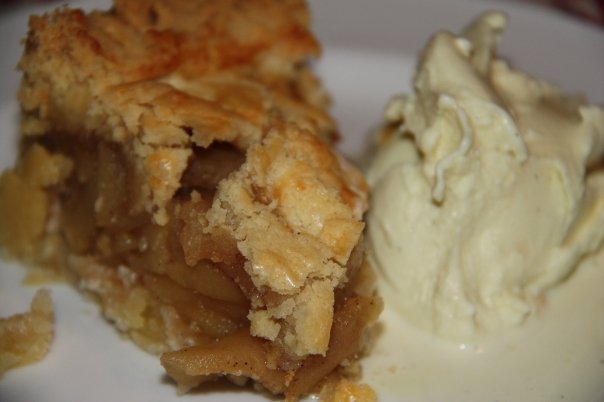
Apple Pie served with ice-cream

Share this:

  • Facebook
  • Twitter
  • More
  • Tumblr
  • Pinterest
  • LinkedIn
  • Reddit
  • Email

Like this:

Like Loading...

Chinese Roast Duck

10 Saturday Dec 2011

Posted by sue-ann in chinese, Chinese Roast Duck, duck, recipes, roasts

≈ 3 Comments

I’ve put off starting this blog for long enough I guess.  It’s so much easier and quicker to just post a picture on facebook with a short caption. But then this allows me more room to share anecdotes, recipes and thoughts on food, cooking, perhaps even life and love.

Chinese Roast Duck


Anyway, to kick this off, allow me to share with you a recipe for Roast Duck, one of my favourite dishes.

I love duck.  Duck Confit, Smoked Duck, Teochew Braised Soya Sauce Duck – it’s all good. But to me, Chinese Roast Duck is hands-down the best.  I’d always wanted to learn how to make it, how to get the skin so thin and crackly, while at the same time keeping the meat moist, tender and juicy. I’d done Confit and Braised Soya Duck, but never Roast Duck. After all, it only takes a short drive out anywhere to get pretty decent and affordable roast duck here in Singapore! But you see, I enjoy the challenge of trying my hand at cooking what I like eating. Just so I know I can do it myself if I wanted to. So yesterday I finally did it. Roast Duck.  It was easier than I’d expected, and what a hit it turned out to be!

This recipe is based on Tyler Florence’s Chinatown Steamed and Roasted Duck recipe on foodnetwork.com.  I tweaked slightly the quantities for some of the ingredients but I followed the method exactly.  The end product was a mouth-wateringly sweet, crackly skin, and tender, juicy, flavourful meat bearing the aroma of orange, ginger and spice. My two girlfriends and I were smacking our lips and licking our fingers as we polished off one entire duck. 

Ingredients

1 whole duck (about 2.4kg)
Dry Marinade


1 tbs Five Spice
2 tsp sugar
2 tsp salt

Aromatics (for stuffing into duck cavity)

15 big slices ginger
2 whole garlics, skin removed, cloves separated and smashed
A bunch of spring onion (enough to grab in one hand)
Orange or tangerine peel from 1 orange or tangerine, in strips
For Glaze
1/4 cup rice vinegar
1/2 cup honey (I used half honey and half maple syrup)
1/2 cup light soya sauce

Method

Clean duck, trimming and removing fat, feet, head and neck. Rinse and dry thoroughly with paper towels.

Mix Dry Marinade ingredients together and rub all over the duck, inside and out.  Leave in fridge for a couple of hours, or overnight.

Ginger, garlic, spring onion and orange peel stuffed into duck
Stuff Aromatics into the cavity of the duck, tie the legs together, pierce all over the skin on breast side (using a skewer), place duck on a wire rack breast side up in a wok/steamer filled with about 1.5 to 2 inches of water, then cover, and steam for 45 mins.  This is to render the fat from the duck.  At the same time, steaming shrinks the duck, which also helps get us that crispy skin when roasting.

Steam duck for 45 minutes

Heat the Glaze in a small saucepan till boiling, simmer 5 to 10 minutes until thickened slightly, then set aside.

After steaming the duck for 45 minutes, remove it from the wok or steamer.  Place duck on a wire rack over an oven-proof tray, and baste with the glaze thoroughly, before placing in a preheated oven at 190 degrees celsius to roast for 1 hour.

Baste the duck every 20 minutes while roasting, and tent with foil if necessary to prevent the skin from getting too dark.

Hope you enjoy this!

Share this:

  • Facebook
  • Twitter
  • More
  • Tumblr
  • Pinterest
  • LinkedIn
  • Reddit
  • Email

Like this:

Like Loading...
Newer posts →

Enter your email address to follow this blog and receive notifications of new posts by email.

Join 17 other subscribers

Visit my facebook page for more pictures from my kitchen

Visit my facebook page for more pictures from my kitchen

Recent Posts

  • Super-moist Nutella and Chocolate Banana Bread
  • Char Kway Teow: Another Experiment in Hawker Fare
  • Lamb Chops rubbed with mint and spices
  • Black Pepper Garlic Striploin Roast, and hello!
  • Deliciously Easy Yet Healthy: Chicken Casserole with Chopped Vegetables

1000 Hits and Counting apple Apple Pie bakes beef Carrot Walnut Cake celebrations Chai Latte Char Siew Chatting Up Your Fruiterer chicken Chicken Rice chicken wings Chicken Wings with 1/2 the Guilt chinese Chinese home-style cooking Chinese Roast Duck drink duck eggs family fish Fish Mee Sua Soup french fries fried rice fruit hawker fare Hearty Chicken and Vegetable Soup Japanese kids Lemongrass and Ginger Iced Tea life Lovesick for Ipoh Hor Fun Nonya Laksa notes and messages one-dish meals pasta Pepper Grilled-Steak with Chopped Summer Salad pie pineapple Pineapple Fried Rice pork Pork Chops potatoes quick and easy recipe recipes roasts Roast Turkey roti john running salad salmon shortcrust pastry sides soup steak Steak and Salmon on a Whim Tau Yew Bak Thai Tiger Prawn Sun-Dried Tomato Pasta travel turkey Uncategorized Vermont Curry

COPYRIGHT 2012

Create a free website or blog at WordPress.com.

Privacy & Cookies: This site uses cookies. By continuing to use this website, you agree to their use.
To find out more, including how to control cookies, see here: Cookie Policy
  • Follow Following
    • lifeisdelish
    • Already have a WordPress.com account? Log in now.
    • lifeisdelish
    • Customize
    • Follow Following
    • Sign up
    • Log in
    • Report this content
    • View site in Reader
    • Manage subscriptions
    • Collapse this bar
%d bloggers like this: